Hi guys ! In this article, I explain step-by-step, with pictures, how to create, manage and deploy virtual machine template.
This article was write in 3 steps :
- Create your template
- Create a custom specs (answer file)
- Deploy your template
Are you ready ? Let’s go !
How to create, manage and deploy virtual machine template ?
-
Create a template
To create a template, no more easy ! You create a virtual machine and you custom it as you want. After you have finished, right click on it!
Here, you have two choices :
- Clone to Template, with this option you have your original virtual machine + your template
- Convert to Template, with this option your virtual machine must be convert directly to a template.


- In this exemple, I’ve select “Convert to template”. Select “Yes” to convert your template

- Your Template was create !

Now, you can clone your Template into Library if you want !

-
Create a custom specs
What are custom specs ?
Customization Specifications is a file that will attach to your Template to personalize it when you start your deployment ! This option is available on your home screen in your vSphere Web Client !

- Click on (+) to create a new Guest Custom Spec

- Select your operating system and add a description if you want. You can also attach a sysprep answer file if you want !

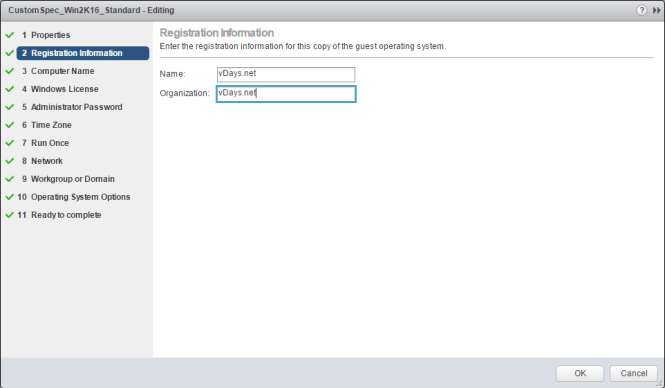
- Add the name of your Organization
- Select how to name your VM

- Add a windows license key to activate your virtual machine automatically

- Add an administrator local password

- Select the time zone

- If you want to run a command line to the first start…

- Here you can choose the network to add at your VM

- Select the domain and user/password that allow to add a new computer in a domain

- /!\ VERY IMPORTANT /!\ This checkbox will be generate a new ID in your VM. if you don’t select this box, all virtual machine will have the same ID and when you use in a domain, you cannot have multiple VM with the same ID.

- A little summary of your custom specs file !

-
Deploy virtual machine template
Now we have a template and custom specs, we can deploy our VM !
- Go to your template, right click on it and select “New VM from This Template“

- Enter the name of your future VM and choose where you want to place it.

- Choose the cluster to deploy your VM

- Select the storage, same as a new virtual machine

- Select the first box, to add a custom spec that we have create in the previous step
- If you want to customize hardware, check the second box

- Here we can see the custom specs that we have create! Select it if you want to use it, otherwise, you can create another one.

- Modify the virtual hardware if you have check box previously

- Summary of your deployment !

-
Start your VM
Now you can start the VM ! It’s possible it will be restart several times !


Your virtual machine is now deployed ! Enjoy ! 🙂
Hi ! I’m Maxime. Founder and independant author of vDays.net. I have worked in service IT since 6 years ago, after a 5 years’ internship. Via this blog, I would like share and discuss with you on new technologies, especially on virtualization and VMware. If you want to know more about me, check out my “about me” page or follow me on Twitter and LinkedIn
